How To Integrate Myuser Into Zoho CRM
Connect Zoho CRM to Myuser in 5 minutes with a Self Client - contacts, deals, meetings and call logs, no marketplace approval needed.
In this blog post, we'll guide you step-by-step through integrating Zoho CRM using a Self Client - Zoho's built-in way to let a tool you trust talk to your CRM without any marketplace approval. This integration enables Myuser to automatically read and write contact and company information, log your outreach emails, booked meetings and calls on each contact's timeline, and create deals in your pipeline - ensuring smoother and more efficient management of your outreach activities.
The whole setup takes about 5 minutes and you stay in full control: the credentials are created in YOUR Zoho account, with exactly the permissions you choose, and you can switch them off at any time. It works on every Zoho CRM edition, including the Free edition.
Step 1: Open the Zoho API Console
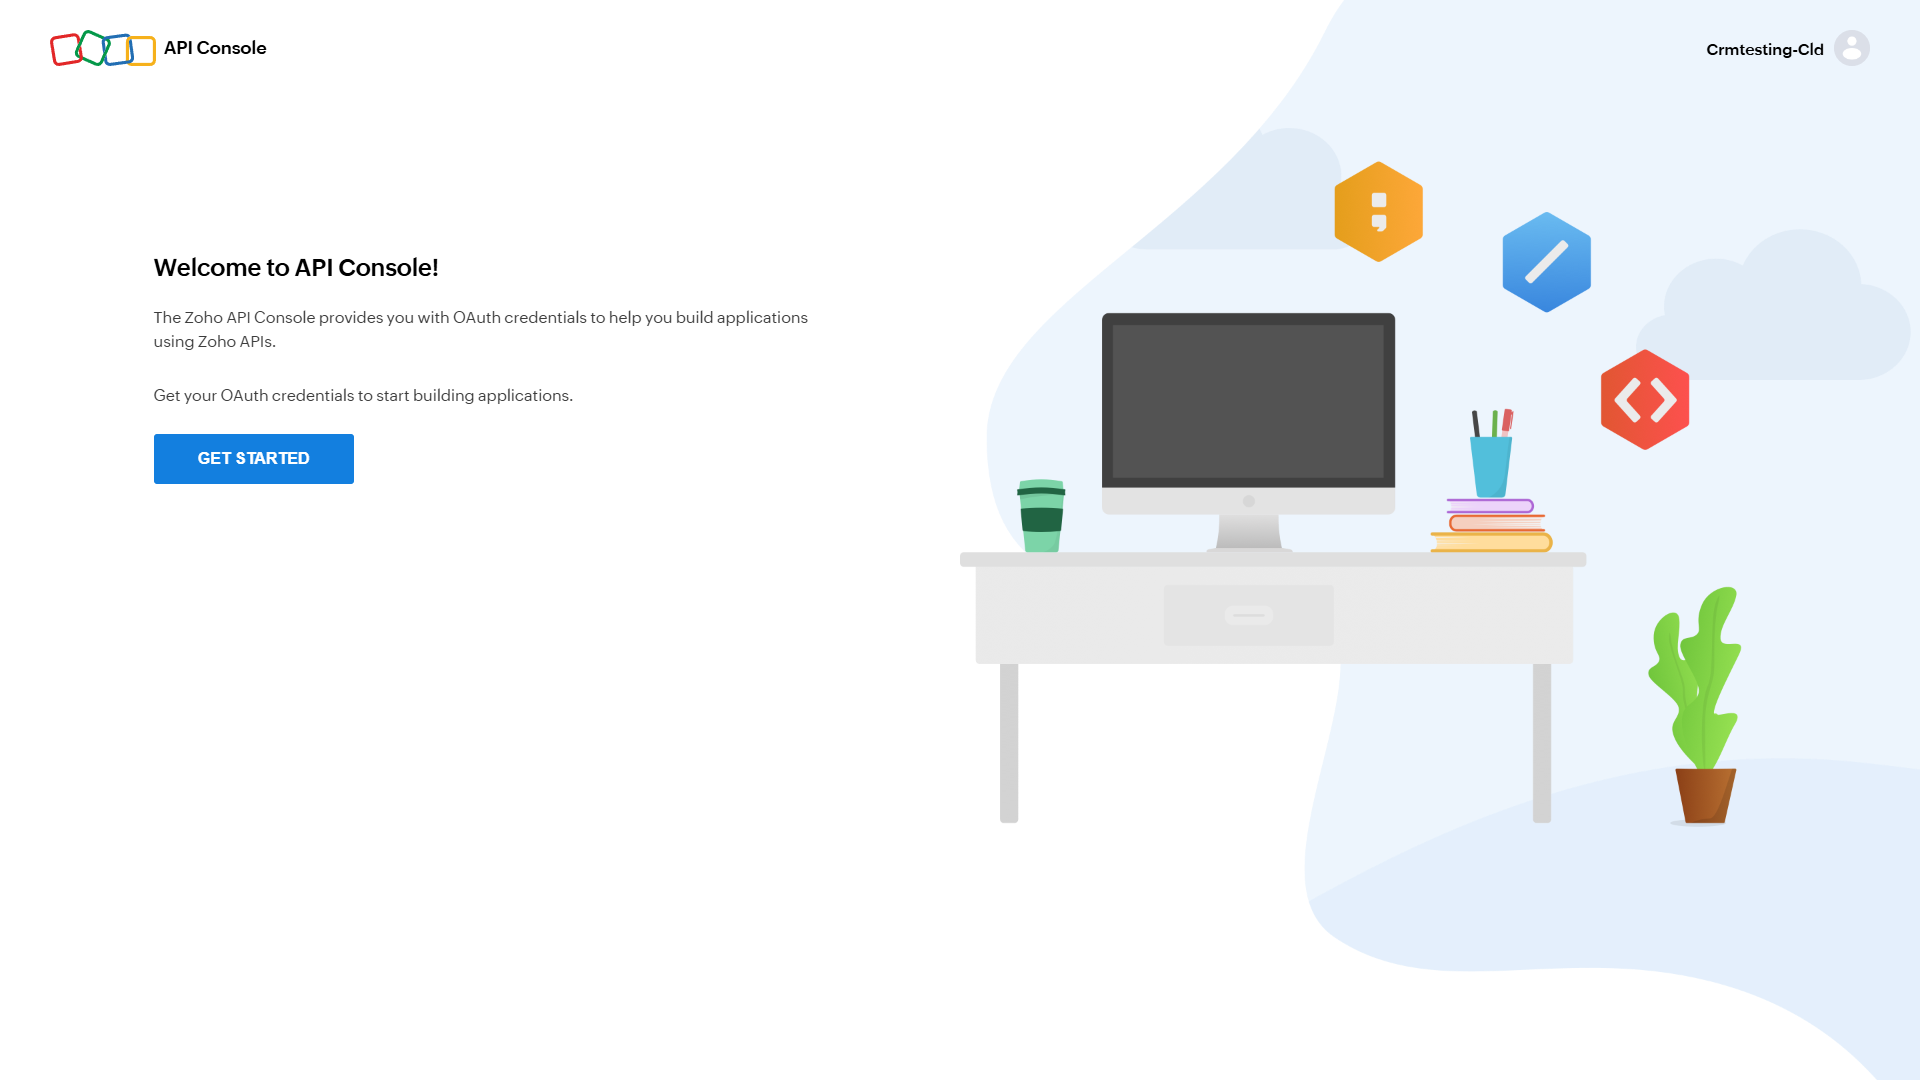
Log in to Zoho, then open api-console.zoho.com in the same browser. The first time you visit you'll see a welcome screen - click GET STARTED.
Step 2: Create a Self Client
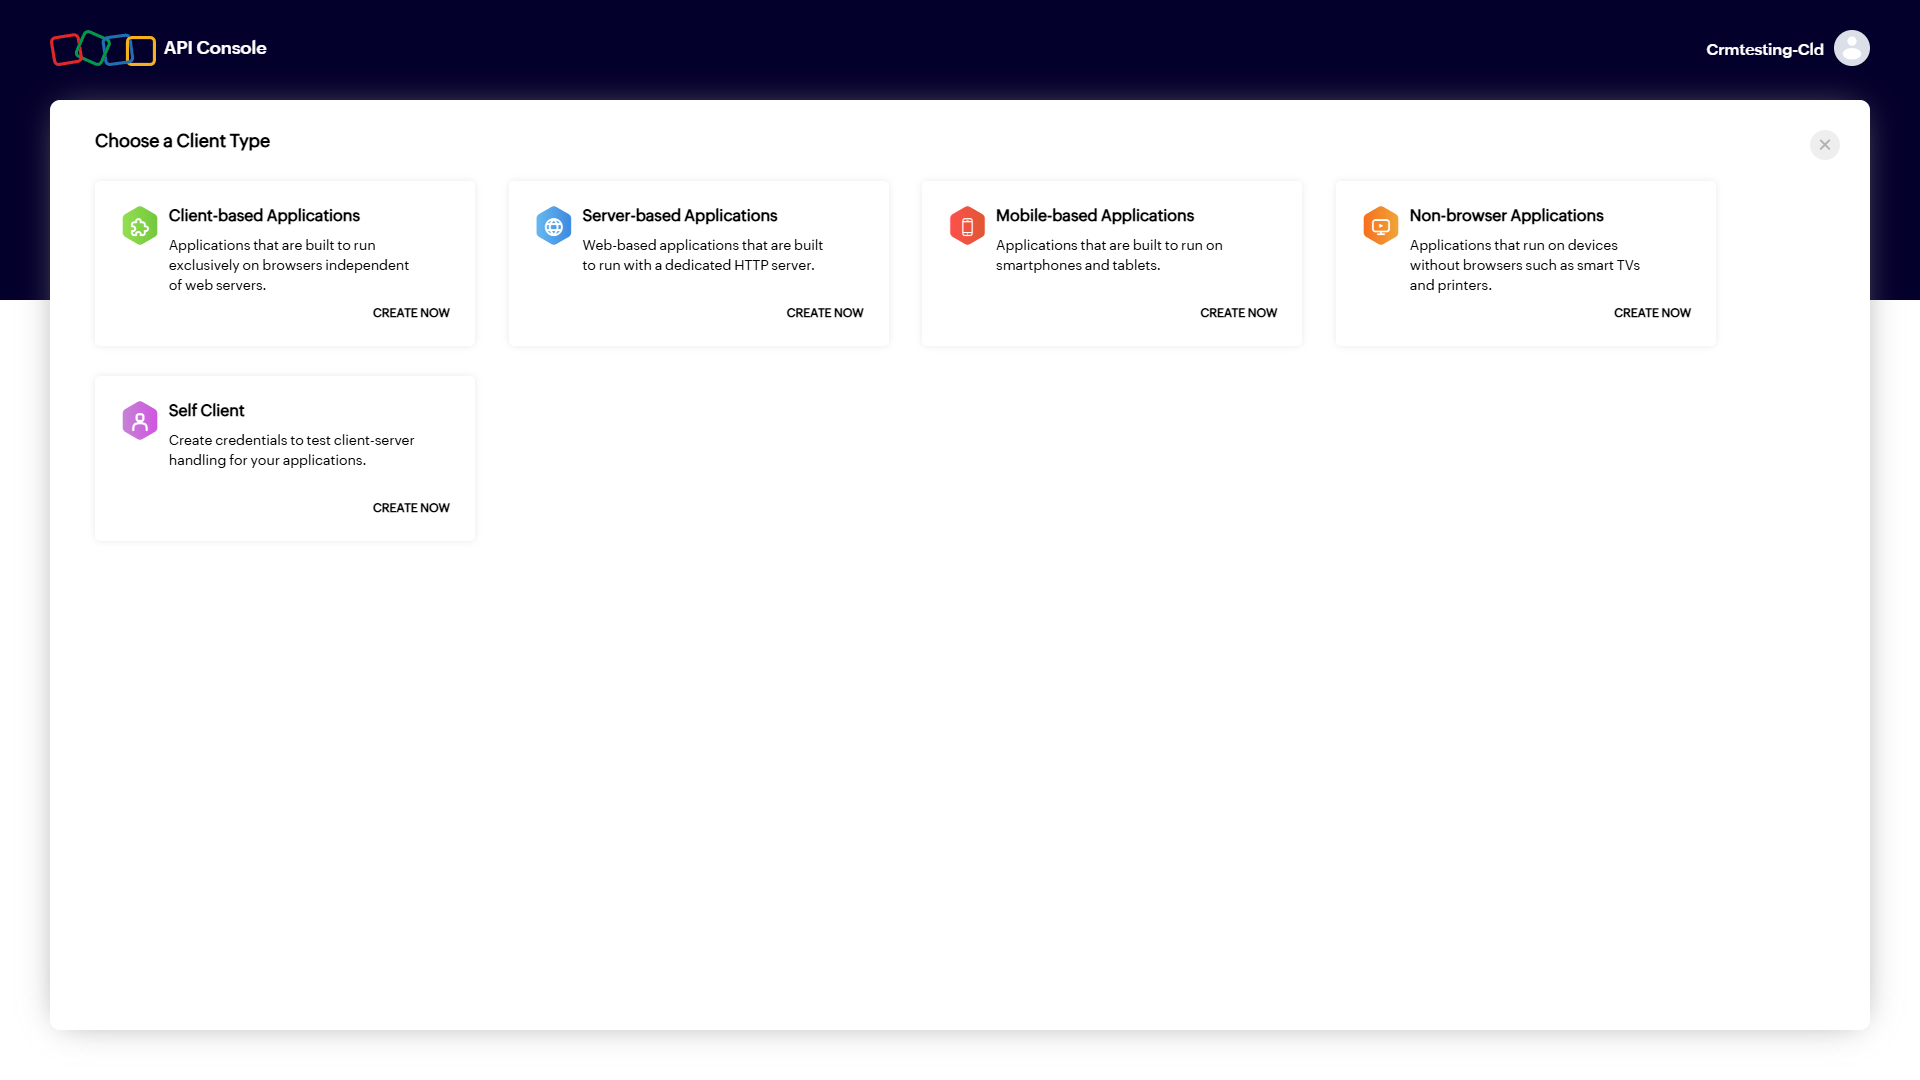
Zoho asks what type of client you want to create. Pick Self Client - the one made for connecting your own account to a tool you use - and click CREATE NOW, then confirm with CREATE and OK in the dialog.
Step 3: Copy the Client ID and Client Secret
Your Self Client now exists. Open its Client Secret tab and copy both values - the Client ID (starts with 1000.) and the Client Secret. You'll paste them into Myuser in the last step.
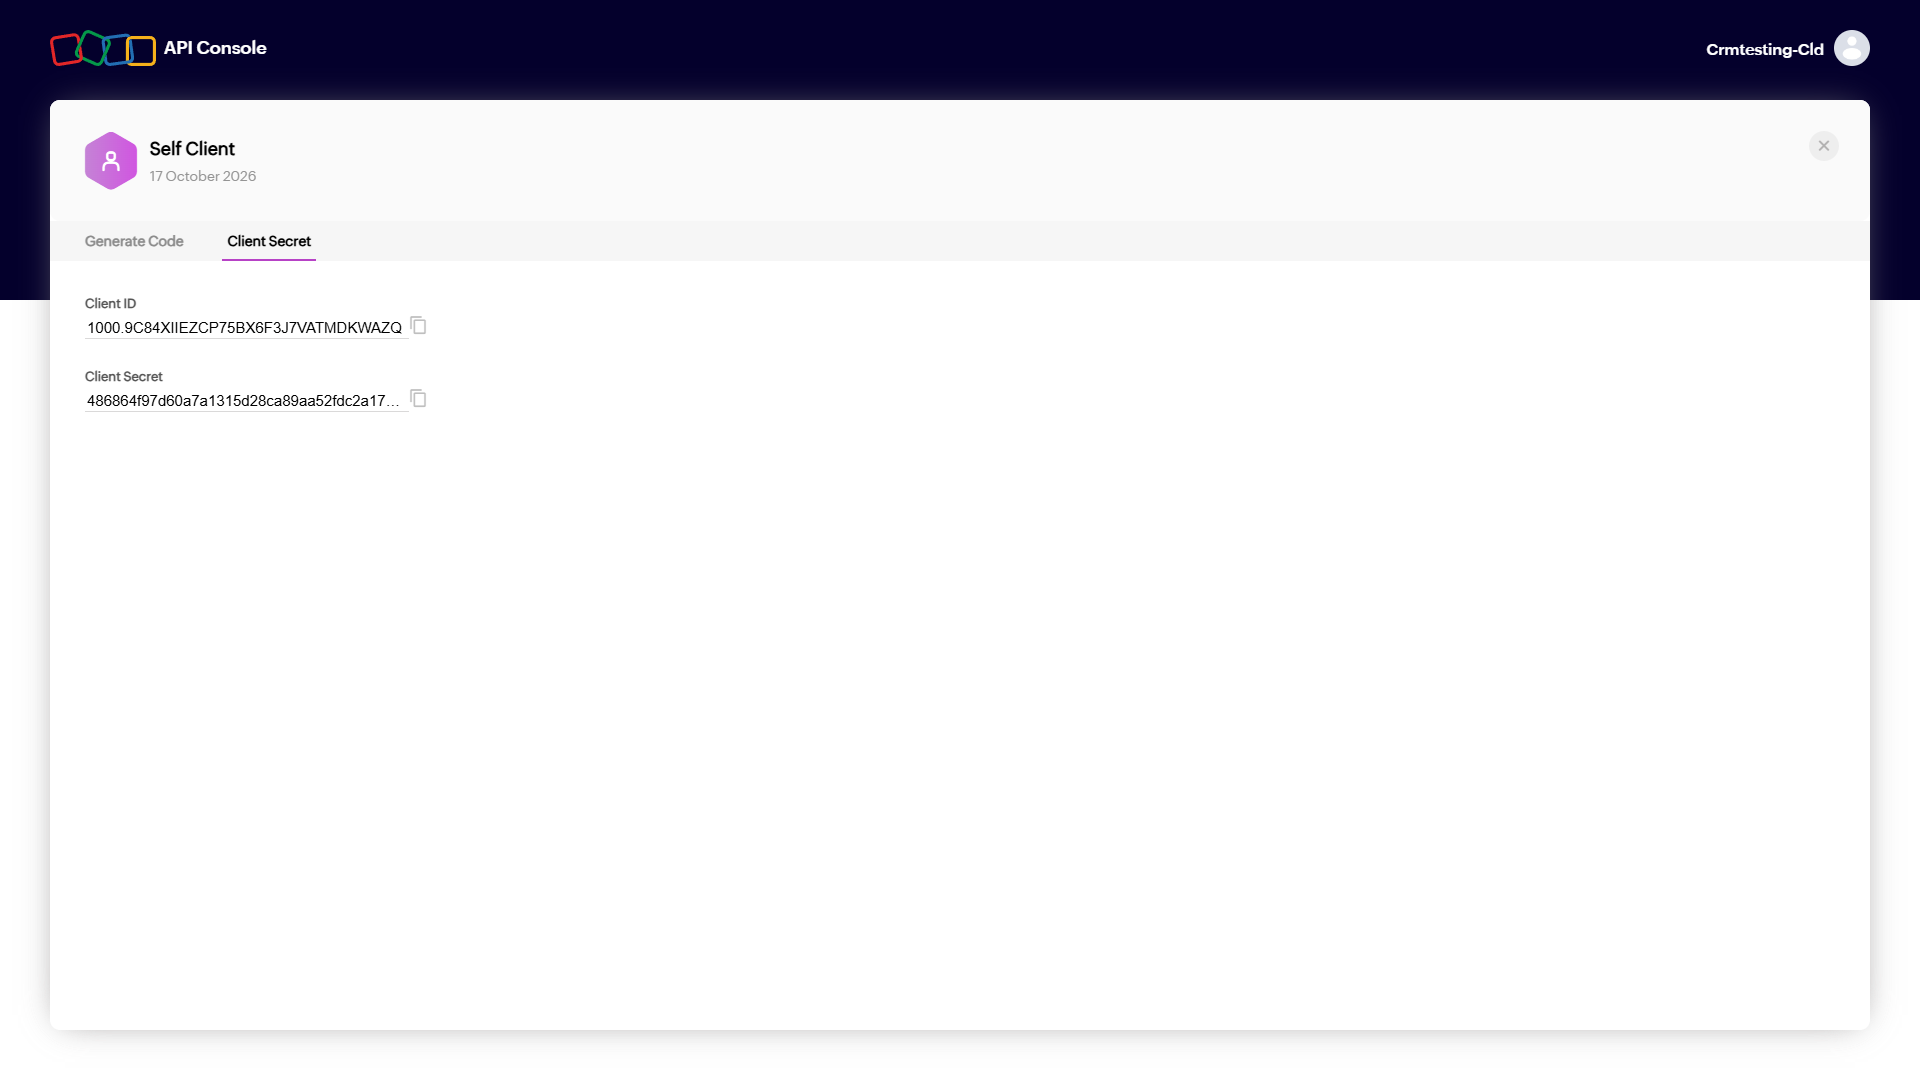
Treat these like a password: together with a grant code they give access to your CRM.
Step 4: Generate the Grant Code
Switch to the Generate Code tab. This is where you choose exactly what the connection is allowed to do:
- In the Scope field, paste this exact line:
ZohoCRM.modules.ALL,ZohoCRM.settings.READ,ZohoCRM.users.READ,ZohoCRM.org.READ,ZohoCRM.coql.READ- Set Code expiry duration to 10 minutes (the longest option - it gives you comfortable time for the last step).
- Description: enter something like Myuser integration.
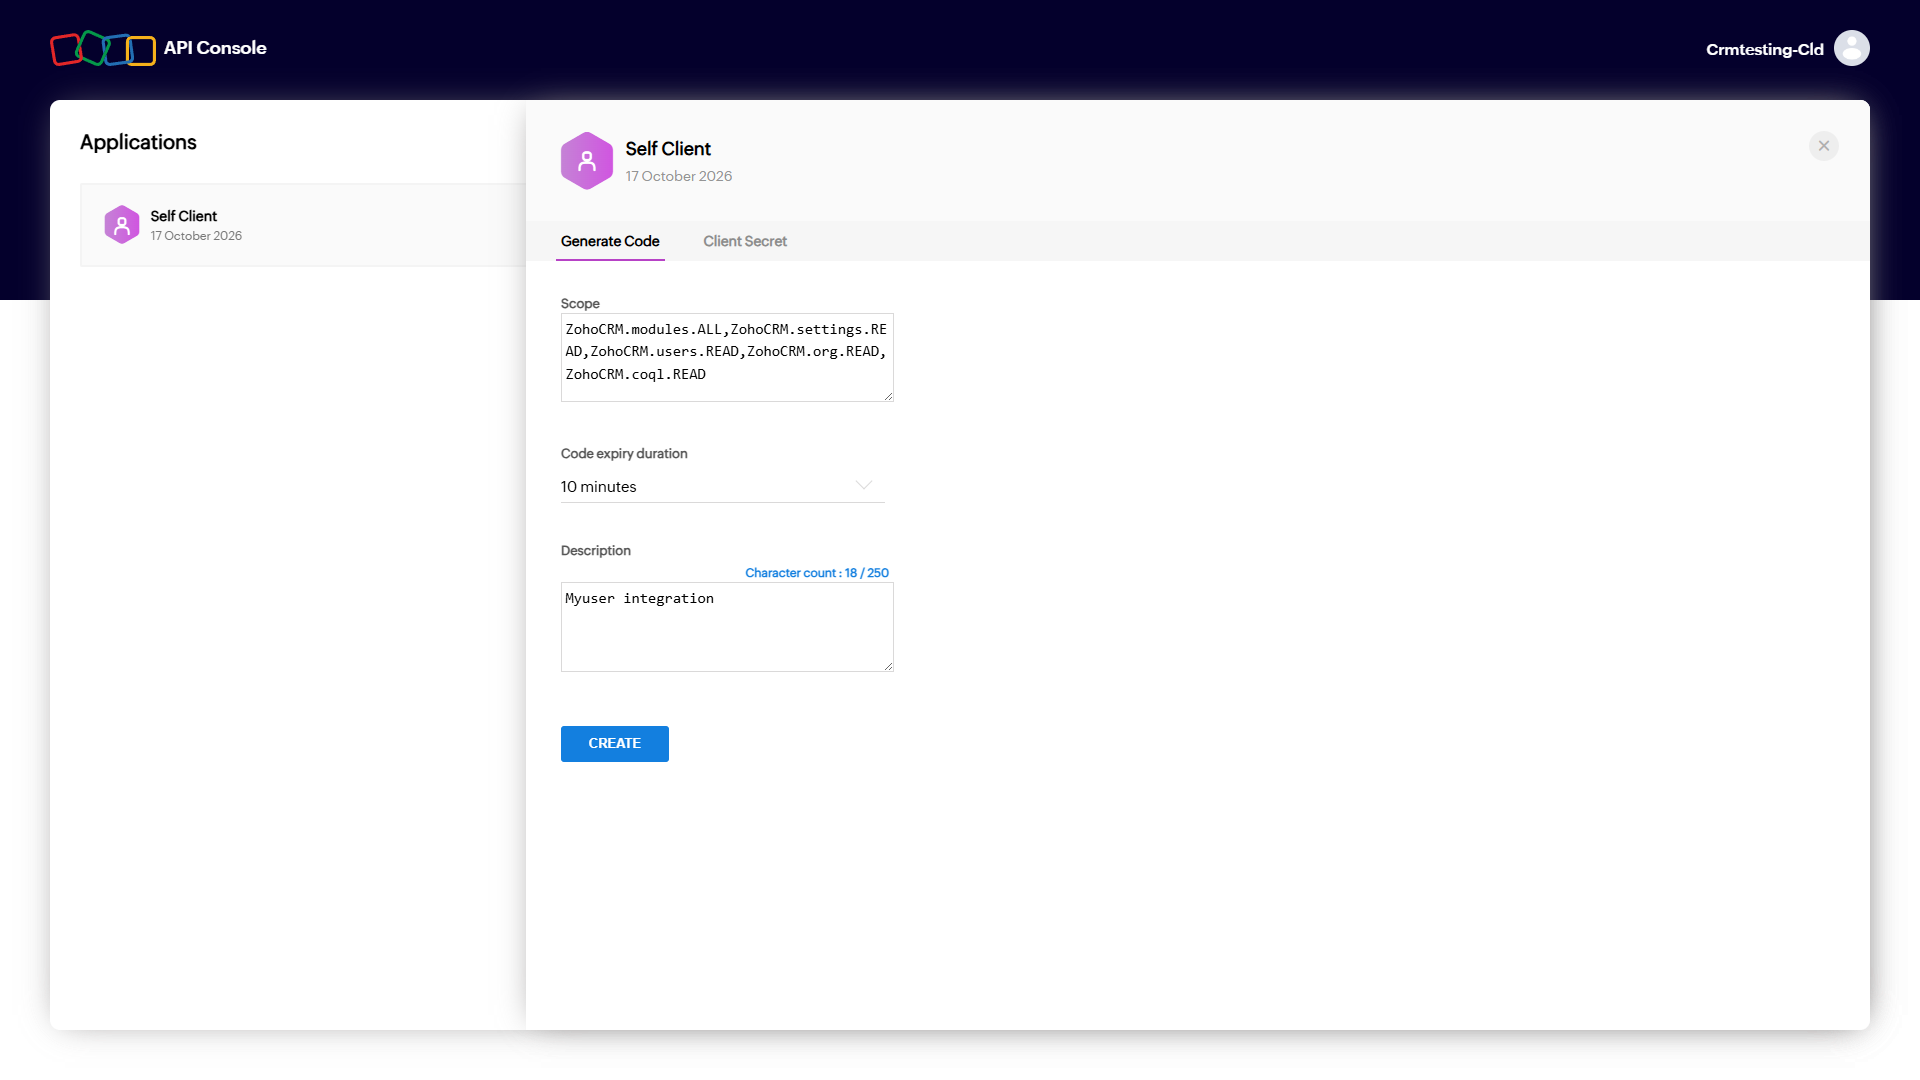
Including the full scope line is important. Without these permissions properly set up, the integration will fail to function as intended. Here is what each one does:
- ZohoCRM.modules.ALL - read and write contacts, accounts, deals, meetings, calls and notes. Read lets us check whether a contact or company already exists so we never create duplicates, and detect meetings booked in your CRM; write lets us create and update records and log outreach on each contact's timeline.
- ZohoCRM.settings.READ - read your deal pipeline's stages, so deals land in the right stage (we never change your stage definitions).
- ZohoCRM.users.READ and ZohoCRM.org.READ - identify the connected account and build "open in Zoho" links to the records we create.
- ZohoCRM.coql.READ - Zoho's fast lookup query, used for reliable duplicate checks.
Click CREATE. If Zoho asks which portal to use, pick your CRM Production environment. A dialog shows your grant code - click COPY.
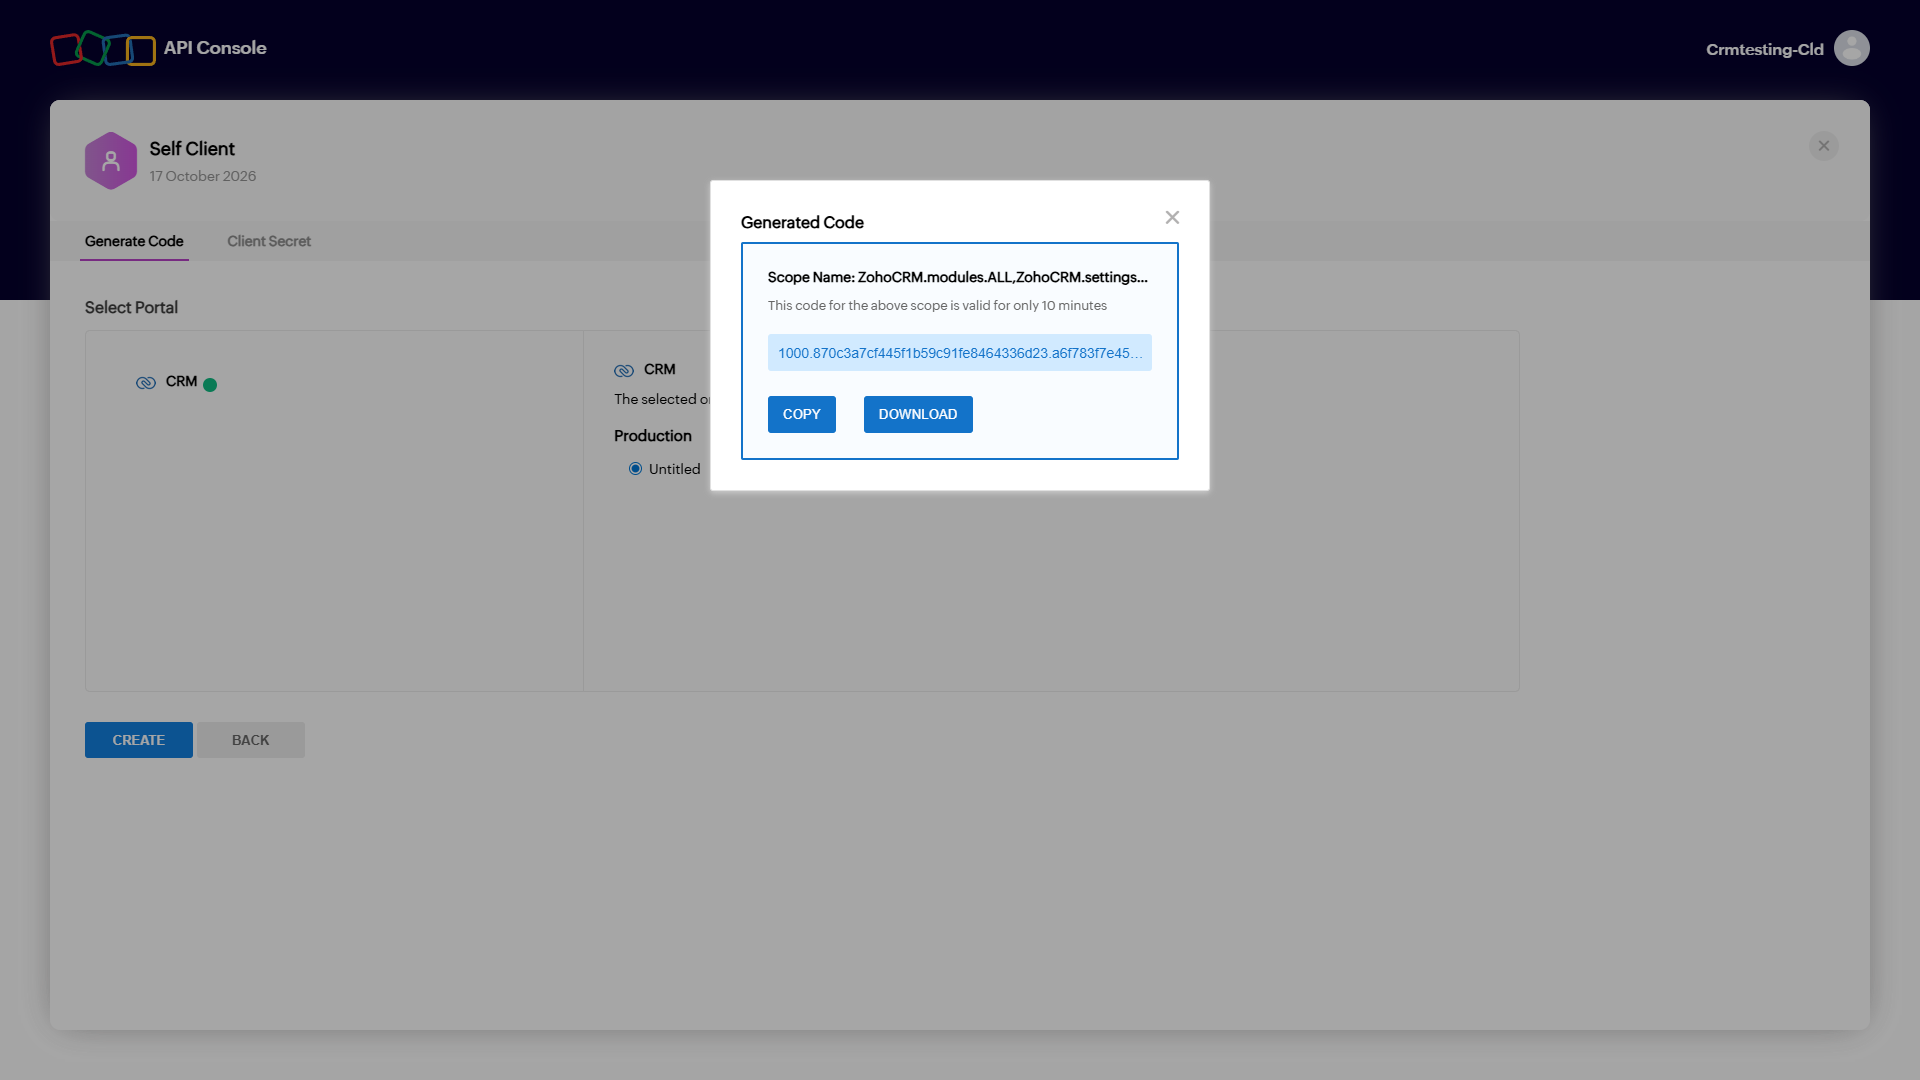
Important: the grant code is single-use and expires in 10 minutes - go straight to the next step. If it expires, no problem: just generate a fresh one the same way.
Step 5: Connect It in the Myuser Dashboard
Finally, navigate to the Myuser dashboard, open Integrations and expand the Zoho CRM card under the CRM section. Fill in the four fields:
- Your Zoho CRM URL - just copy whatever is in your browser's address bar while logged into Zoho CRM (it only tells us your region: US, EU, India, Australia, Japan or Canada - we extract it automatically, however long the URL is).
- Client ID - from Step 3.
- Client Secret - from Step 3.
- Grant code - from Step 4 (fresh).
Click Test Integration. Myuser exchanges the grant code for a permanent connection right away and saves it automatically, then pushes live test records - a contact, an account, a logged email, a meeting and a deal - and links every record it created so you can open them in Zoho. Green lines everywhere means you're all set!
Congratulations - your Zoho CRM integration is now ready, allowing seamless transfer of lead information and faster management of your outreach efforts.
Troubleshooting
- "Zoho rejected the credentials (invalid_code)" - grant codes are single-use and die in 10 minutes. Generate a FRESH code (Step 4) and save again right away.
- "invalid_client" - the Client ID or Client Secret has a typo. Re-copy both from the Self Client's Client Secret tab.
- A permission error on one of the test lines - the grant code was generated without the full scope line. Generate a new code with the exact line from Step 4 and reconnect - the card's "See how to fix" button walks you through it.
- Wrong region - if you use Zoho EU/IN/AU/JP/CA and the connection fails, make sure the Your Zoho CRM URL field contains your real CRM address (e.g.
https://crm.zoho.eu/...) so we pair with the right Zoho data center.
Staying in control
- The connection uses exactly the scopes you granted in Step 4 - nothing more.
- You can see the Self Client any time at api-console.zoho.com. Deleting it instantly cuts off all access (every token it issued stops working).
- To disconnect from the Myuser side, type
deleteinto the Client ID field on the Zoho CRM card and save. - To change permissions, generate a new grant code with a different scope line and reconnect - the new connection replaces the old one.
Need Help?
If you have any questions or encounter issues during this integration process, please reach out to our support team - we're always here to assist!
Happy Integrating!